Wisdom’s Cloud
[Linux] [CentOS] LVM(2) 본문

지난 시간(2022.09.06 - [LINUX] - [Linux] [CentOS] LVM(1))에 생성한 LVM을 확장하고 축소해보자.
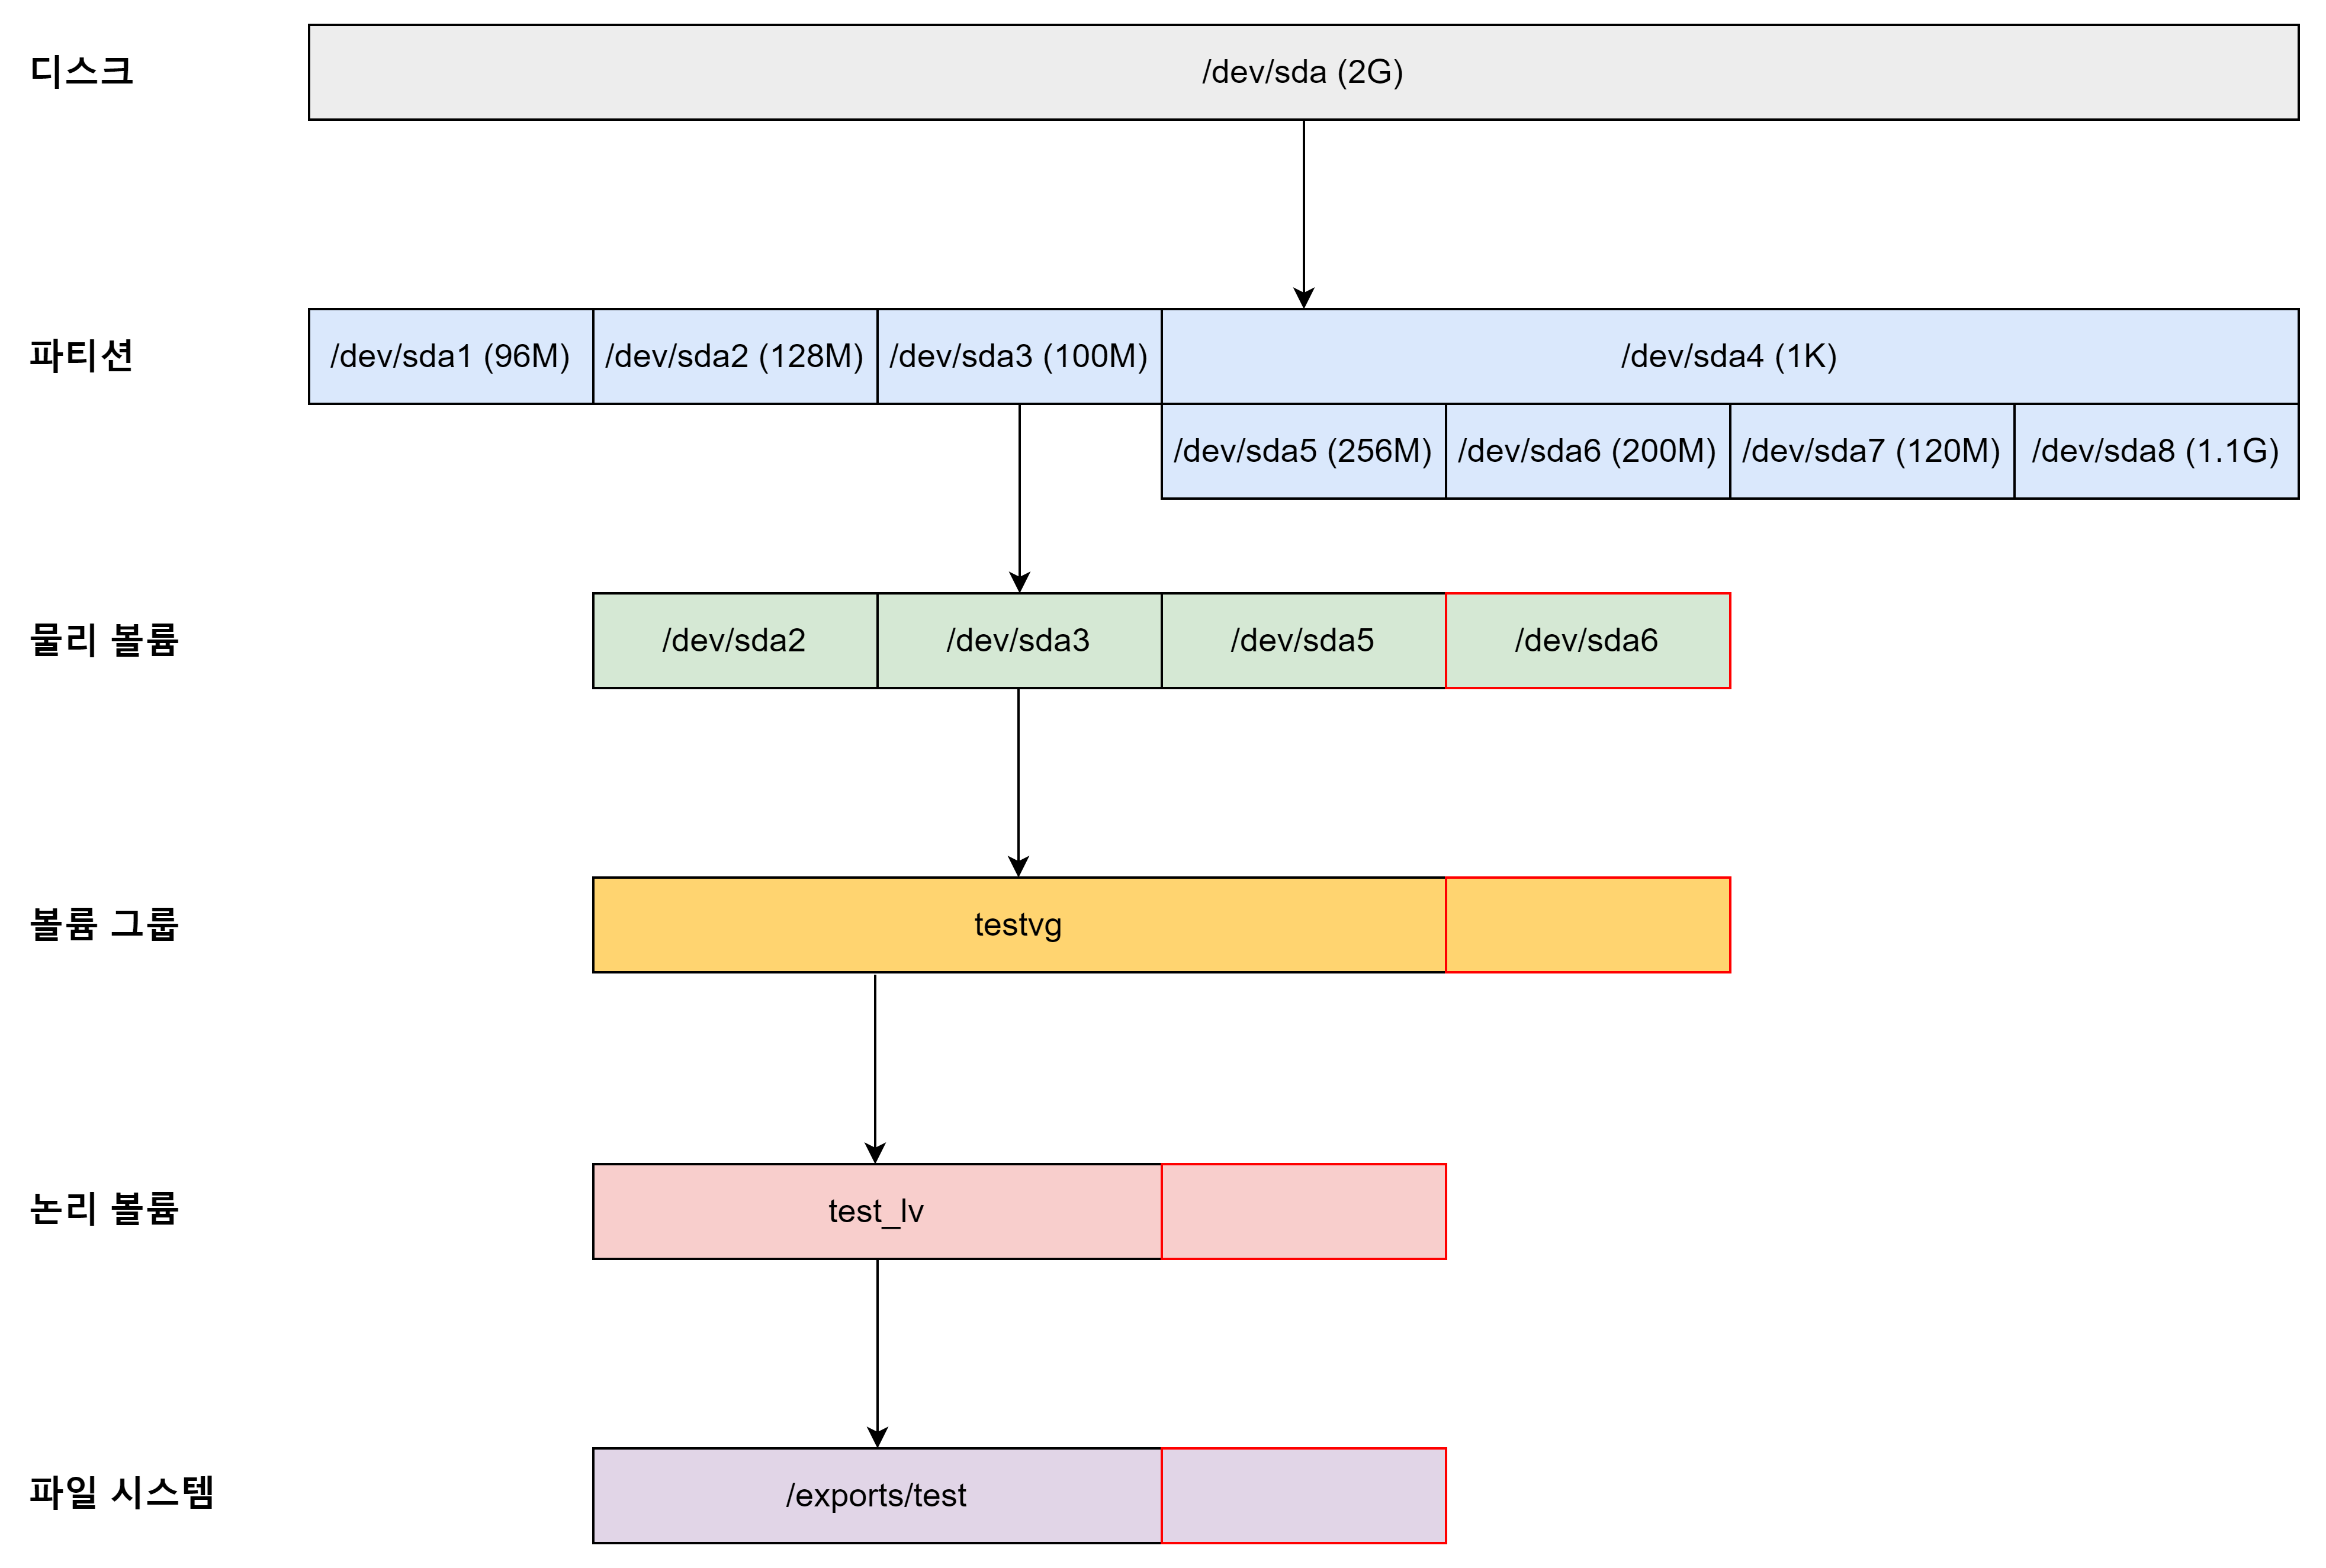
아래 그림과 같이 /dev/sda6를 LVM에 추가하고 제거해보자.

1. /dev/sda6 추가
df 명령어를 통해 현재 파일시스템의 크기를 확인해보면, testvg-test_lv의 크기가 약 200M인 것을 볼 수 있다.
이 testvg-test_lv에 /dev/sda6를 추가하고 300M로 확장해보자.

1-1) PV 생성
먼저 /dev/sda6의 PV를 만들어준다.
[root@server-1-lab ~]# pvcreate /dev/sda6
  Physical volume "/dev/sda6" successfully created.
1-2) VG 확장
그리고 vgextend 명령어로 testvg에 /dev/sda6를 추가해준다.
[root@server-1-lab ~]# vgextend testvg /dev/sda6
  Volume group "testvg" successfully extended
1-3) LV 확장
lvextend 명령어로 test_lv의 크기를 200M에서 300M로 확장시켜준다.
-L 옵션을 사용하여 크기를 설정할 수 있다.
[root@server-1-lab ~]# lvextend -L 300M /dev/testvg/test_lv
  Size of logical volume testvg/test_lv changed from 200.00 MiB (20 extents) to 300.00 MiB (30 extents).
  Logical volume testvg/test_lv successfully resized.
1-4) 파일시스템 확장
resize2fs 명령어로 파일시스템의 크기를 리사이징한다.
xfs 유형의 파일시스템은 xfs_growfs 명령어를 사용하면 된다.
[root@server-1-lab ~]# resize2fs /dev/testvg/test_lv
resize2fs 1.42.9 (28-Dec-2013)
Filesystem at /dev/testvg/test_lv is mounted on /exports/test; on-line resizing required
old_desc_blocks = 2, new_desc_blocks = 3
The filesystem on /dev/testvg/test_lv is now 307200 blocks long.
1-5) 결과
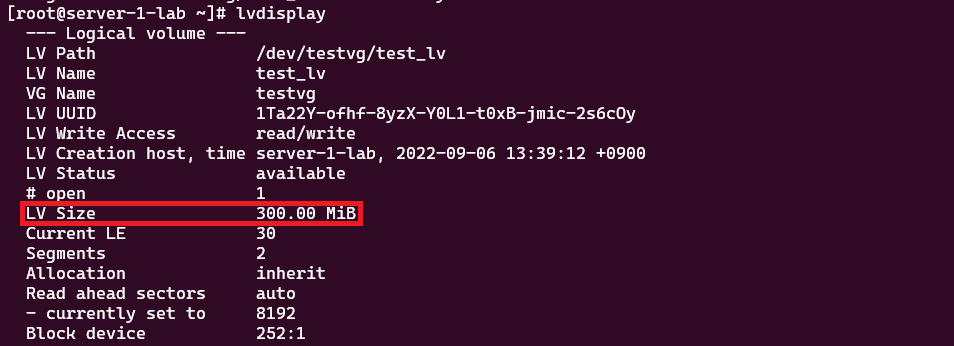
testvg-test_lv의 크기가 약 300M로 확장된 것을 확인할 수 있다.

2. /dev/sda6 제거
이번에는 반대로 testvg-test_lv에서 /dev/sda6를 제거하고 100M로 축소해보자.

2-1) 마운트 해제
LVM을 축소할 때는 기존의 데이터가 손상될 수 있기 때문에 마운트를 해제하고 백업을 한 후 진행하는 것을 권장한다.
그리고 xfs 유형의 파일시스템은 축소 기능을 지원하지 않는다.
[root@server-1-lab ~]# umount /exports/test
2-2) LV 축소
lvreduce 명령어로 test_lv의 크기를 300M에서 100M로 축소시켜준다.
마찬가지로 -L 옵션을 사용하여 크기를 설정할 수 있다.
이전에는 e2fsck나 xfs_repair 명령어로 파일시스템의 무결성을 점검하고 파일시스템의 크기를 리사이징한 후에 LV를 축소하였는데, 지금은 -r 옵션을 사용할 수 있기 때문에 이 과정을 생략하고 바로 축소할 수 있다.
따라서 -r 옵션을 사용하면 자동으로 파일시스템을 점검하고 리사이징한 후에 LV를 축소하기 때문에 훨씬 간편해졌다.
[root@server-1-lab ~]# lvreduce -r -L 100M /dev/testvg/test_lv
fsck from util-linux 2.23.2
/dev/mapper/testvg-test_lv: 11/77824 files (0.0% non-contiguous), 15979/307200 blocks
resize2fs 1.42.9 (28-Dec-2013)
Resizing the filesystem on /dev/mapper/testvg-test_lv to 102400 (1k) blocks.
The filesystem on /dev/mapper/testvg-test_lv is now 102400 blocks long.

  Size of logical volume testvg/test_lv changed from 300.00 MiB (30 extents) to 100.00 MiB (10 extents).
  Logical volume testvg/test_lv successfully resized.
2-3) VG 축소
vgreduce 명령어로 testvg에서 /dev/sda6를 제거해준다.
[root@server-1-lab ~]# vgreduce testvg /dev/sda6
  Removed "/dev/sda6" from volume group "testvg"
2-4) PV 제거
/dev/sda6의 PV도 제거해준다.
[root@server-1-lab ~]# pvremove /dev/sda6
  Labels on physical volume "/dev/sda6" successfully wiped.
2-5) 마운트
이제 LVM 축소가 완료되었으니 다시 마운트를 해준다.
[root@server-1-lab ~]# mount /dev/testvg/test_lv /exports/test
2-6) 결과
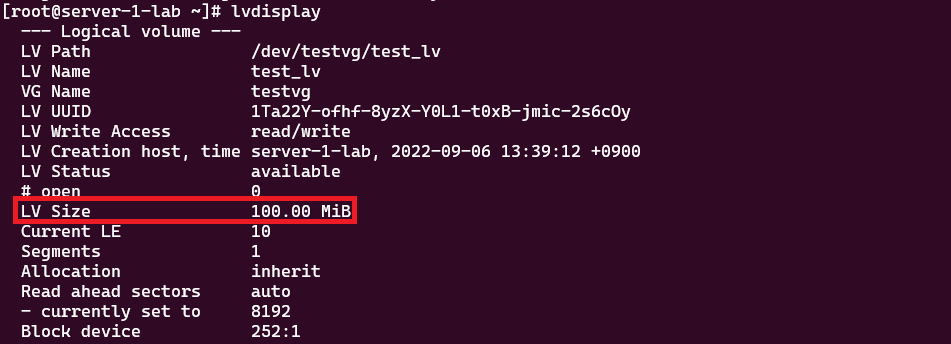
testvg-test_lv의 크기가 약 100M로 축소된 것을 확인할 수 있다.

[참고 문서]
4장. CLI 명령을 사용한 LVM 관리 Red Hat Enterprise Linux 6 | Red Hat Customer Portal
Access Red Hat’s knowledge, guidance, and support through your subscription.
access.redhat.com
https://access.redhat.com/solutions/32530
How to shrink an LVM Logical Volume - Red Hat Customer Portal
How Do I Shrink A LVM Logical Volume? I have a 100Gb LVM logical volume. I need another logical volume that is 20Gb. How do I do this?
access.redhat.com
'LINUX > Advanced' 카테고리의 다른 글
| [Linux] [CentOS] YUM Repository (0) | 2022.09.09 |
|---|---|
| [Linux] [CentOS] swap (0) | 2022.09.08 |
| [Linux] [CentOS] LVM(1) (1) | 2022.09.06 |
| [Linux] [CentOS] 하드디스크와 파티션 (1) | 2022.09.05 |
| [Linux] [CentOS] 시스템 정보 수집 (0) | 2022.09.05 |


